
FINAL PROJECT DISH #1: MURGH MARKANI
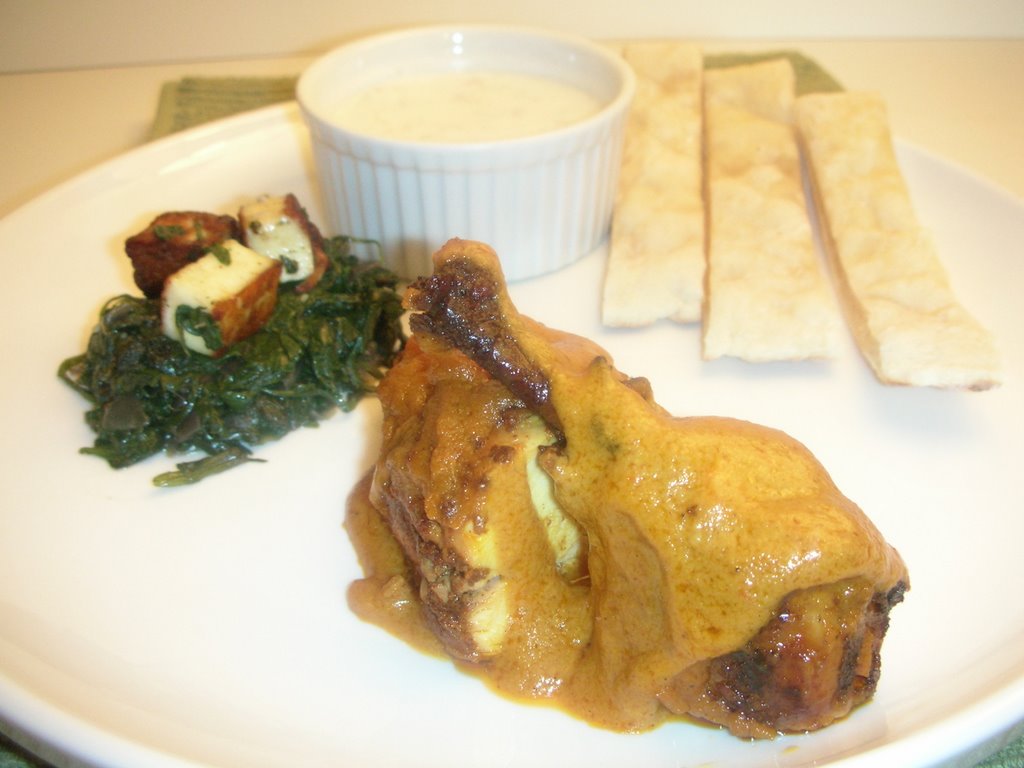 So I've got one dish down for my final project, my Murgh Makhani, a Cornish Game Hen Butter Chicken-Style with Palak Paneer with Naan and Cucumber-Radish Raita. This is the dish that inspired my menu and it came about when I thought about a dinner I had with a classmate at Tabla back in April. I was very disappointed by the food at Tabla. While the restaurant used Indian spices and flavors it's stretch to haute cuisine missed the mark for me. There wasn't any fun in it.
Some of the flavors were there but my standard Delhi Dhaba fare wasn't there. It wasn't even reinterpreted much, sure there was a cheese kulcha but it was more whiz (cheese than bang!) and no nod to Gulab Jamun or Butter Chicken? One of my most favorite food experience this past year was at A Voce when I tasted Chef Carmellini's duck meatballs. Why can't dhaba fare be reinterpreted into haute cusine? Suddenly I started to come up with other dishes from the equivalent of dhabas in other cultures which I thought could be played with in a way to make cliched classics into dishes that could be served white-linen style with or without the linens. Thus my theme, REMINAGINED CLASSICS FROM GLOBAL DHABAS.
When it finally came calling on me, the inspiration flashed quickly, but the cooking of this cornerstone dish would be anything but quick. In fact, it's probably going to be the most difficult dish because there are a lot of homemade components: homemade yogurt, homemade paneer cheese and a sauce and marinade that use complicated spice blends.
 And as much as I love Indian food, I've had more experience eating it than cooking it so some research was necessary. I relied heavily upon one book in particular, 1,000 Indian Recipes by Neelam Batra for inspiration and guidance. On the jump, the whole proverbial ball of wax from scratch to sniff...hang on.
THE CHICKEN
I looked through many, many recipes or butter chicken to try to determine how they might differ:
-CDKitchen had several recipes for Butter Chicken that I waded through.
-The Food Network also featured a recipe for Butter Chicken (Indian Chicken in Tomato Cream Sauce).
-Cooks.com also had two recipes for this chicken dish, Butter Chicken and Indian Butter Chicken.
-SIFY food linked to a recipe for Butter Chicken by Shaheen Ahmed from Abu Dhabi.
-INDOlink had a recipe for Butter Chicken by Anuradha Burman.
-Cusine Du Monde also included a recipe for this popular chicken dish.
-Wikipedia even had a recipe for Butter Chicken, or Murgh Markani (pronounced muck-knee) as well as some information about the history of the dish:
Butter chicken or murgh makhani is an Indian dish popular in countries all over the world that have a tradition of Indian restaurants. The dish was invented by accident at Kake Da Hotel in Connaught Place, New Delhi. While the dish's general recipe is well known, the actual flavor can vary from restaurant to restaurant even within Delhi.
It is a dish made by marinating a chicken overnight in a yoghurt and spice mixture usually including ginger, lemon or lime, pepper, coriander, cumin, chilli, methi and garlic. It is in some ways similar to chicken tikka masala.
The chicken is then roasted or baked.
A sauce is made from butter, tomatoes, almonds and various spices, often including cumin, cloves, cinnamon, coriander, pepper, fenugreek and sometimes cream. Once the sauce is prepared the marinated and roasted chicken is chopped and added to it.
-Finally, there was the recipe for the chicken which I came across for Wednesday Wash-Down from the Washington Post.
But what were the differences between the recipes and which one was the best to use? Some recipes used tumeric, coriander, allspice, cashews, almonds, cumin, honey, tomato paste, cayenne, ginger, chili powder, even frozen peas and tomato sauce! So what to do? Well, almost all the recipes used garlic and ginger pastes and an ingredient called garam masala. I decided to base my recipe on a mixture of some of the many ingredients which appealed to me from the different recipes. Using the recipe from the Washington Post as a guide I altered it with additional spices.
Turo's Chicken Makani with Cornish Game Hen
For Chicken Marinade:
1 Teaspoon Plus 2 Tablespoons Chili Powder
3 Tablespoons Lime Juice
1 ½ Teaspoons Salt (to taste)
1 Cornish Game Hen, Quartered
1 Cup Plain Yogurt
2 Tablespoons Garlic Paste
1 Teaspoon Ginger Paste
½ Teaspoon Garam Masala (powdered Indian spice blend)
2 Tablespoons Vegetable or Canola Oil
1 to 2 Tablespoons Unsalted Butter, Melted, for Basting
For the Sauce:
1 to 2 Tablespoons Unsalted Butter
1 Tablespoon Combination of Whole Cloves, 1/4 of a Crumbled Cinnamon Stick, Whole Black Pepper, Cardamom Seeds (Whole Garam Masala Blend)
1 Tablespoon Coriander
1 Tablespoon Garlic Paste
1 Tablespoon Ginger Paste
1 Tablespoon Seeded and Shopped Mild Chili Peppers
1 Cup Crushed Tomatoes
1 Tablespoon Sun-dried Tomato Puree
1 Teaspoon Chili Powder
1 Teaspoon Tumeric
1 Cup Water
Salt
½ Teaspoon Sugar
½ Teaspoon Honey
1 Cup Heavy Cream or Half-and-Half
1½ Cup Milk
3 Tablespoons Cashews
1 Tablespoon Almond Paste
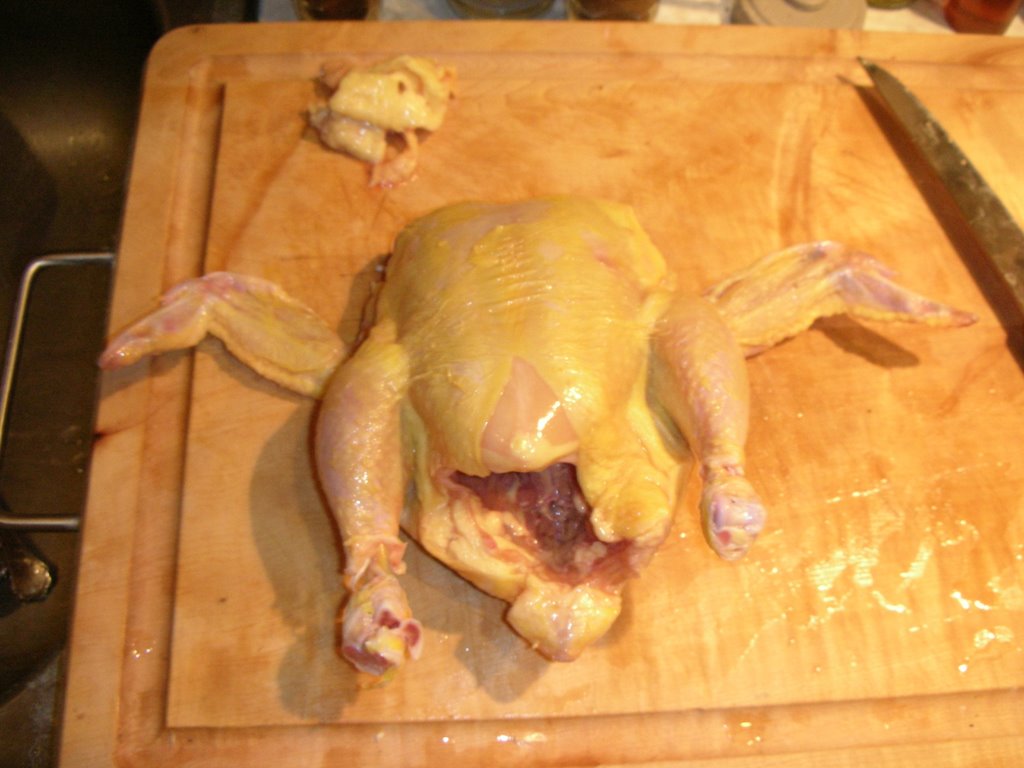 For Chicken & Marinade: Quarter chicken and reserve trimmings. Mix 1 teaspoon chili powder, 1 tablespoon lime juice and salt, to make a paste. Rub paste into the meat. Place chicken in a resealable plastic food storage bag and let it rest, refrigerated, for 30 minutes.
 Line a colander with cheesecloth and place the yogurt on it to drain for 15 minutes. Transfer to a medium bowl and add the remaining 2 tablespoons of chili powder, salt to taste, garlic and ginger pastes, the remaining 2 tablespoons of lime juice, garam masala and oil, stirring to combine. Add the marinade to the chicken, making sure the meat is evenly coated. Refrigerate for 4 hours or overnight. When ready to cook, preheat the oven to 350ºF.
 Remove the quartered chicken from the marinade (reserving the marinade). Pat dry the quartered pieces. In a large pan heat a few tablespoons of vegetable oil and a tablespoon of butter. Sear all sides of the chicken pieces then remove from pan. Bake in a large ungreased baking dish for 20 minutes on top of the marinade, and baste the chicken with melted butter. Turn and repeat basting, bake for 20 more minutes, or until the chicken is almost cooked through but still moist.
For the sauce: Meanwhile, in a large pot over medium-low heat, melt the butter. Brown the reserved trimmings and then discard them. Add the whole garam masala, which will crackle. Then add the garlic and ginger pastes and chopped chili peppers. Cook for a few minutes until the mixture is fragrant. Add the crushed tomatoes, sun-dried tomato paste, chili powder, tumeric, garam masala, and the water. Add salt to taste. Increase the heat to medium-high and bring to a boil, then reduce the heat to low and cook for 10 minutes. Add the sugar and honey, then the cream or half-and-half, stirring constantly.
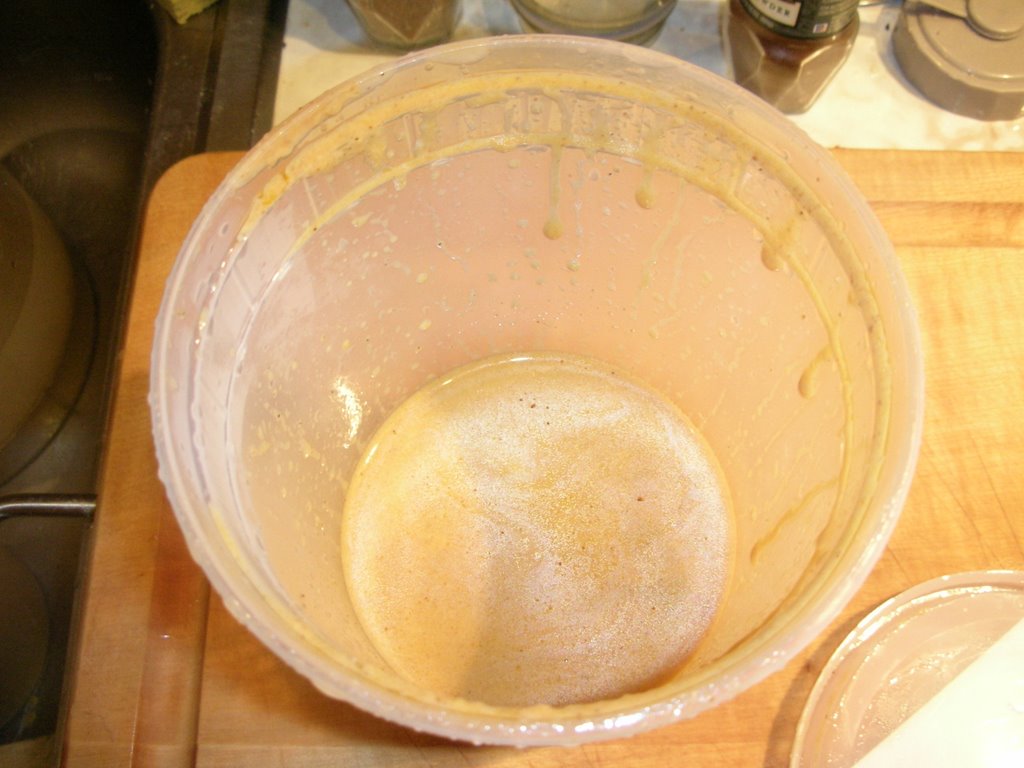 Strain sauce if desired (I did and it doesn't leave you with much so if you're not going for that smooth, silky, 'refined' look don't bother, left). Separately, mix ¾ milk with cashews and almond paste in a food processor and blend til smooth. Add nut paste to strained sauce add the remaining ¾ cup milk and mix over medium heat.
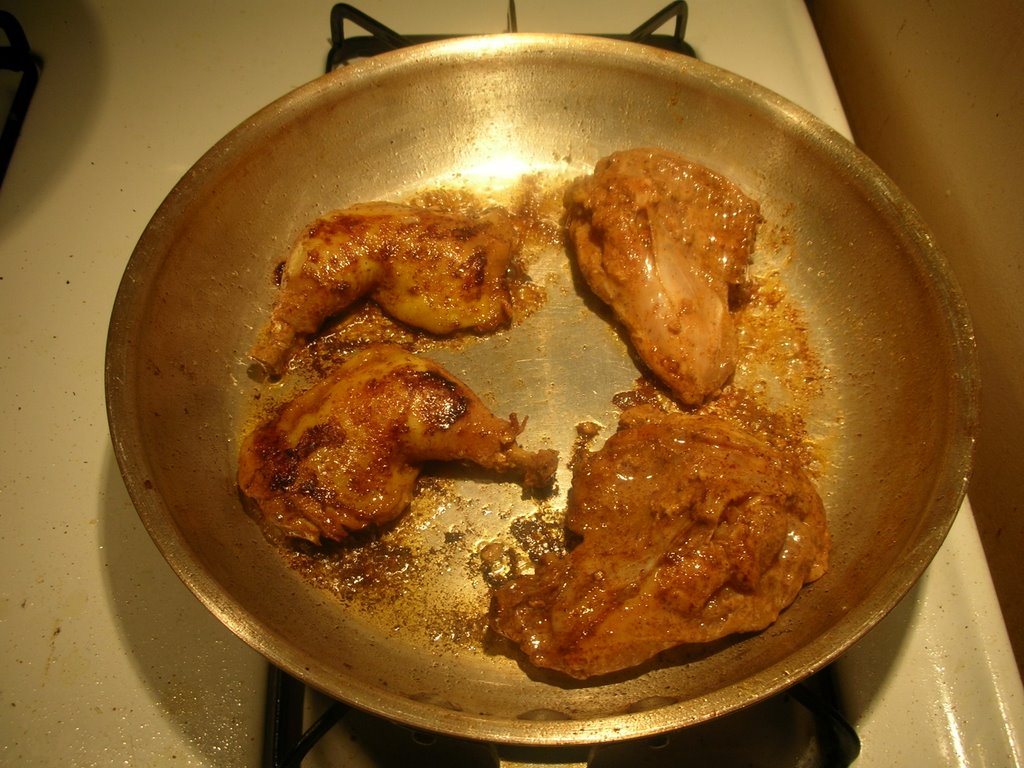 Either serve with sauce draped over chicken or transfer the chicken to the pot, stirring to coat them with the sauce, and cook for 5 minutes. If using cubes of chicken breast (proceed with marinade identically but transfer pieces to the pot, coat, cook and serve).
Chicken Makani (Indian Butter Chicken, Washington Post, June 28, 2006, F5)
6 to 8 servings
Here, the sauce can be done 1 day ahead. All of the ingredients -- including garlic and ginger pastes, dried fenugreek leaves, ground and whole spices for garam masala -- can be found in the international aisle of large supermarkets. To make this vegetarian, substitute large cubes of panir cheese for the chicken. Serve with naan (Indian flatbread) and basmati or jasmine rice.
For the chicken and marinade:
1 teaspoon plus 2 tablespoons chili powder
3 tablespoons lime juice
1 1/2 teaspoons salt, plus additional to taste
About 1 3/4 pounds boneless, skinless chicken thighs (may substitute chicken breasts, cut in thigh-size pieces)
1 cup plain yogurt (not nonfat)
2 tablespoons garlic paste
1 teaspoon ginger paste
1/2 teaspoon garam masala (powdered Indian spice blend)
2 tablespoons vegetable or canola oil
1 to 2 tablespoons unsalted butter, melted, for basting
For the sauce:
1 to 2 tablespoons unsalted butter
1 tablespoon combination of whole cloves, 1/4 of a crumbled cinnamon stick, whole black pepper, cardamom seeds (whole garam masala blend)
1 tablespoon garlic paste
1 tablespoon ginger paste
1 tablespoon seeded and chopped mild chili peppers (optional)
1 3/4 cups tomato puree
1 teaspoon chili powder
1/2 teaspoon garam masala (powdered)
1/2 teaspoon dried fenugreek leaves (also known as kasturi methi)
1 cup water
Salt
1/2 teaspoon sugar, or to taste (may substitute 2 tablespoons honey)
1 cup heavy cream or half-and-half.
For the chicken and marinade: Combine 1 teaspoon of the chili powder, 1 tablespoon of the lime juice and the salt, blending to make a paste. Make shallow cuts in the chicken and rub the paste into the meat. Place the chicken in a resealable plastic food storage bag and let it rest, refrigerated, for 30 minutes.
Meanwhile, line a colander with cheesecloth and place the yogurt on it to drain for 15 minutes. Transfer to a medium bowl and add the remaining 2 tablespoons of chili powder, salt to taste, garlic and ginger pastes, the remaining 2 tablespoons of lime juice, garam masala and oil, stirring to combine. Add the marinade to the chicken, making sure the meat is evenly coated. Refrigerate for 4 hours or overnight.When ready to cook, preheat the oven to 350 degrees.
Remove the chicken from the marinade (discarding the marinade). Bake in a large ungreased baking dish for 20 minutes, then baste it with the melted butter. Turn and bake for 20 more minutes or until the chicken is almost cooked through but still moist.
For the sauce: Meanwhile, in a large pot over medium-low heat, melt the butter. Add the whole garam masala, which will crackle. Then add the garlic and ginger pastes and chopped chili peppers, if desired. Cook for a few minutes until the mixture is fragrant. Add the tomato puree, chili powder, garam masala, dried fenugreek leaves and the water. Add salt to taste. Increase the heat to medium-high and bring just to a boil, then reduce the heat to low and cook for 10 minutes. Add the sugar, then the cream or half-and-half, stirring constantly. (The dark sauce will turn an orangey pink.) Transfer the cooked chicken pieces to the pot, stirring to coat them with the sauce, and cook for 5 minutes. Serve hot.
Per serving (based on 8): 202 calories, 18 g protein, 9 g carbohydrates, 11 g fat, 59 mg cholesterol, 5 g saturated fat, 520 mg sodium, 1 g dietary fiber.
THE PALAK PANEER
I've always wondered what the difference was between Palak Paneer and Saag Paneer. From what I've been able to glean it seems the difference is that Saag Paneer can be made with greens other than spinach, say for instance mustard greens. I'm definitely interested in making Palak Paneer because that's the dish you'll find in most dhabas, at least the ones I've been to. In Palak Paneer, the spinach is accompanied by small cubes of cheese (some places cheat with a creamed spinach, they shouldn't-- it's a poor substitute).
For my menu, I wanted to make everything from scratch, including the cheese. I followed a recipe for the Paneer cheese from 1,000 Indian Recipes:
Paneer (1,000 Indian Recipes, pps. 43-44)
Makes 8 ounces or about 30 1¼-inch places
Paneer cheese, made by curdling milk with something sour, such as yogurt, lemon juice or vinegar, and then seaparating the curds from the whey, is also called Indian cottage cheese or farmer's cheese. This soft, spongy cheese with its sweet, milky aroma is perservativ-free, has no artificial additives, and can be made with low-fat or whole milk (nonfat milk will not work; you'll end up with a hard and leathery cheese).
Paneer cheese doesn't melt when heated, although too much stirring will cause it to break. Freshly made paneer cheese, warm and right out of the cheesecloth, is much prized for its own taste. Indians love it just by itself, or dressed with a little chaat masala, a savory and spicy seasoning blend that instantly perks up flavors, and fresh herbs. I even serve paneer cheese as part of an antipasto platter, giving it an Italian twist with salt, pepper, chopped fresh basil, and balsamic vinegar. Paneer is easy to scatter over salad, or add to pizza, lasagna, sandwiches, and rice, which can be used in curries, stews, and even desserts.
When making paneer cheese, use only heavy-bottomed aluminum or anodized metal pans, and to avoid accidental spills, add the curdling agent almost as soon as you can see bubbles rising in the milk.
Paneer cheese stays fresh in the refrigerator about 5 days and can also be frozen. To freeze, cut into desired size pieces, stand each piece on a plate in a single layer and freeze. When frozen, transfer to plastic freezer bags and freeze 3 to 4 months. This enables you to remove and use only the number of pieces you need for the recipe.
As an alternative, you can buy paneer cheese in the refrigerator section of Indian markets.
½ Gallon Lowfat or Whole Milk
2 Cups Plain Yogurt, Nonfat or any kind, whisked until smooth, or ¼ cup fresh lemon juice, or a mixture of both
1 (2-foot square) Piece of Fine Muslin or 4 layers of cheesecloth.
 1. Place the milk in a large, heavy saucepan and bring to a boil, stirring gently, over high heat. Before the milk boils and the bubbles spill over, mix in the yogurt or the lemon juice, and continue to stir until the milk curdles and separates into curds and whey, 1 to 2 minutes. Remove from heat.
 2. Drape the muslin or cheesecloth over a large pan and pour the curdled milk over it. As you do this, the whey drains through the cloth into the pan, and the curdled paneer cheese remains in the cloth.
 3. With the paneer cheese still inside it, pick up the cloth from the pan and tie the ends of the cloth around the kitchen faucet to drain, making sure that the cheese is a few inches above the bottom of the sink. Allow to drain 3 to 5 minutes.
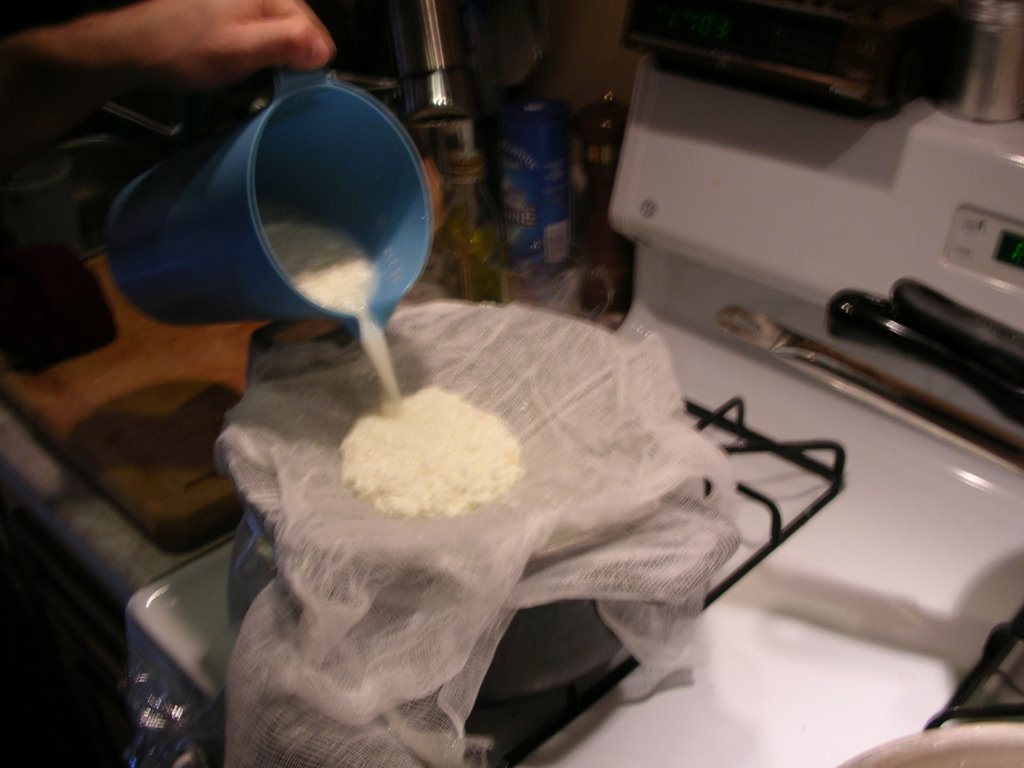 4. Remove from the faucet and gently twist the cloth snugly around the cheese, then place the cheese between two salad-size plates (or any other flat surfaces), with the twisted cloth edges placed to one side, out of the way. Place a large pan of water on the top plate and let the cheese drain further, 10 to 12 minutes. (Do this close to the sink or within a baking pan, or you'll have a mess to clean up.)
 5. Remove the pan of water from the paneer cheese (which, by now, should have compressed into a chunk), cut into desired shapes and sixzes and use as needed. Sotore in an airtight container in the refrigerator 4 to 5 days or freeze up to 4 months.
Variations: Paneer cheese can also be made with about ½ cup fresh or bottled lemon or lime juice, 3 to 4 tablespoons white or any other vinegar, or 1 quart buttermilk. Lemon juice and vinegar will yield about 6½ ounces of paneer cheese, and the buttermilk will yield about 8 ounces. Paneer cheese can also be made with non-dairy soy milk (made from bean curd or tofu) or with a mixture of soy milk and milk. Make both these variations as you would with milk, and follow the directions above.
 I followed the recipe for the cheese and was pleasantly surprised by how well it turned out and how simple the recipe actually was. While I compared and came up with my own recipe for butter chicken based on research into about 9 recipes I found online, I made my Palak Paneer based on one recipe I found on RecipeDelights.com.
Palak Paneer
½ KG Spinach
100 G Paneer
1 Onion
3 Tablespoons Butter
2-3 Bay Leaves
1 Teaspoon Cumin Seeds
Salt to Taste
¼ Teaspoon Black Pepper Powder
¾ Teaspoon Ginger-garlic Paste
½ Garam Masala Powder
Vegetable Oil As Required
1. Mix ginger-garlic paste, green chili paste and some water with spinach. Pressure cook it for about 7-8 minutes (just before the first whistle). 2. But paneer into small cubes. Keep 3 cubes separately for decoration.
3. Heat 2 tablespoons of butter. Fry the paneer pieces on 'medium' heat til they turn slightly brown. Set the paneer pieces aside.
4. Heat 2 tablespoons of butter. Fry bay leaves and cumin seeds. Add chopped onion. Fry until the onions become pink.
5. Add salt, black pepper powder, garma masala. Stir well.
6. Add paneer and cooked spinach (grinded). Mix well. 7. Put palak paneer in a baking tray. 8. Add rest of the butter. Bake for ½ hour at 180°C (356°F)
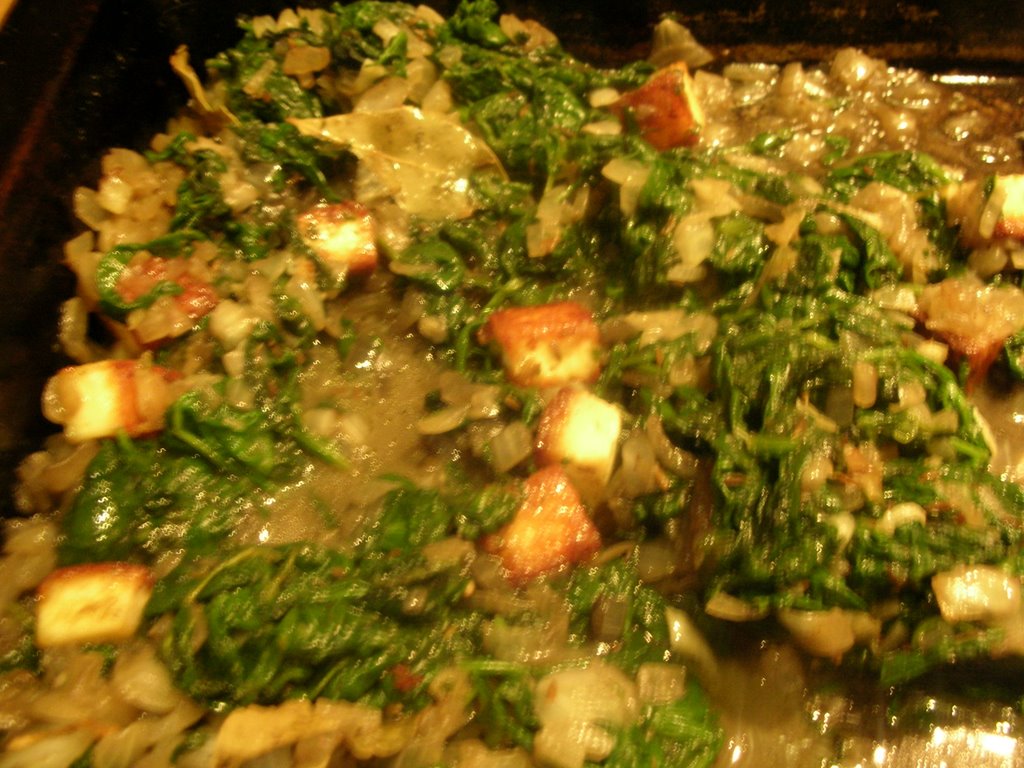 I did alter the recipe. First, I shocked the spinach in an icebath to try to help it keep its green color. I also decided that the spinach could use more flavor so doubled the ginger and garlic from ¾ of a teaspoon to 1½. I also lowered the baking temperature to 200°F.
THE RAITA
The yogurt was made from scratch using whole Stonybrook Milk and a recipe for Ghar ki Dahi (from 1,000 Indian Recipes, p. 42). The Cucumber and Radish Raita was then adapted from 1,000 Indian Recipes below.
Turo's Cucumber and Radish Raita
1 Teaspoon Chaat Masala
2 Cups Nonfat, Plain Yogurt, Whisked Until Smooth (Ghar ki Dahi, p.42)
1 Cucumber, Peeled and Grated
5 Radishes, Grated
½ Teaspoon Salt, or to taste
½ Teaspoon Freshly Ground Black Pepper, Or To Taste
½ Teaspoon Ground Paprika
! Teaspoon Minced Cilantro
Prepare the chaat masala. Place the yogurt in a serving bowl. Add the cucumbers, radishes, chaat masala, salt, and pepper and stir to mix well. Garnish with the paprika and cilantro and serve.
Ghar ki Dahi (1,000 Indian Recipes, p. 42)
Makes about 4 cups
Yogurt-making is a simple, easy, and very gratifying art. With very little work, you can have fresh yogurt or curd, as it is called in India every day-- the kind that is naturally sweet and has active cultures. Furthermore, you can rest assured that hommade yogurt is free of all the unnecessary and artificial additives added to prolong the shelf life of its store-bought counterpart.
Any and all types of pots and pans may be used though I find terra-cotta and ceramic ones to be the best. But this is partly sentiment--my mother always maintained that these containers added a certain claming and cooling effect to the body-warming yogurst.
Made with milk and a starter (store-bought yogurt with live cultures or yogurt from a previous homemade batch), homemade yogurt is delicate, sweet and smooth. It can be made with any type of milk--whole, 2 percent, 1 pewrcent, or nonfat. For health reasons I generally make mine with nonfat milk.
4 Cups Milk
2 Tablespoons Plain Yogurt, Nonfat or Any Kind, With Active Culture
1 Pot Holder
1 or 2 Large, Thick Kitchen Towels
1. Bring the milk to a boil, stirring frequently with a metal spatula in a heavy aluminum saucepan. (Do not use lightweight stainless steel or nonstick Teflon or Silverstone-coated saucepans; stainless steel is not a good cunductor of heat, invariably burning the milk, and in the coated pans a layer of brown skin forms at the bottom of the pot, ruining the entire project.)
2. Alternately, put the milk in a large microwave-safe bowl and boil, uncovered, on high power until bubbles rise to the top, 9 to 10 minutes. Remove from the microwave as soon as it boils.
3. Trasnfer to a yogurt pot (preferably ceramic, though any container will do), and cool until the milk registers 118°F to 120°F on a meat thermometer. Stir in the yogurt starter and cover with a loose-fitting lid.
4. Put a pot holder on a shelf in a kitchen cabinet. Place the yogurt pot on top of the pot holder, fold the towels in half and cover the yogurt pot snugly on every side. This insulates the pot and helps maintain the ideal temperature necessary for the multiplication of the yogurt bacteria. (You can also place the yogurt pot in a turned-off gas oven with a pilot light to achieve the same effect.)
5. Allow the milk to rest undisturbed 3 to 4 hours. Then check to see if the yogurt is set. When you do this, do not pick up the pot or place a fork in the yogurt. Simply uncover the pot and see if the yogurt is firm--almost like gelatin. You may see some watery liquid over the yogurt; disregard it. (You may remove it after chilling the yogurt.) Once the yogurt is set, refrigerate it immediately. The longer freshly made, fully developed yogurt sits unchilled, the stronger and more sour it gets. Serve chilled.
Note: To sweeten yogurt that has soured over time. Indians routinely drain out the wey and then mix in some milk (any type will do). The milk adds its sweetness and lends a freshly made flavor to yogurt.
Kheera aur Mooli Ka Raita (p. 225)
Almost like a salad, this has lots of colorful vegetables, adding a light crunch to the otherwise smooth yogurt. After grating and chopping, you should have about 3 cups of the vegetables, but the proporions don't have to be precise.
1 Teaspoon Chaat Masala
2 Cups Nonfat, Plain Yogurt, Whisked Until Smooth
2 to 4 Seedless Cucumbers, Grated (Peeled or Unpeeled)
12 to 15 Red Radishes, Grated and Squeezed
1 Large Firm Tomato, Finely Chopped
1 Fresh Green Chile Pepper, Such as Serrano, Minced with Seeds
½ Teaspoon Salt, or to taste
½ Teaspoon Freshly Ground Black Pepper, Or To Taste
½ Teaspoon Ground Paprika
Cilantro or Mint Leaves
Prepare the chaat masala. Place the yogurt in a serving bowl. Add the cucumbers, radishes, tomato, gree chile pepper, chaat masala, salt , and pepper and stir to mix well. Garnish with the paprika and cilantro or mint leaves, and serve.
THE BREAD
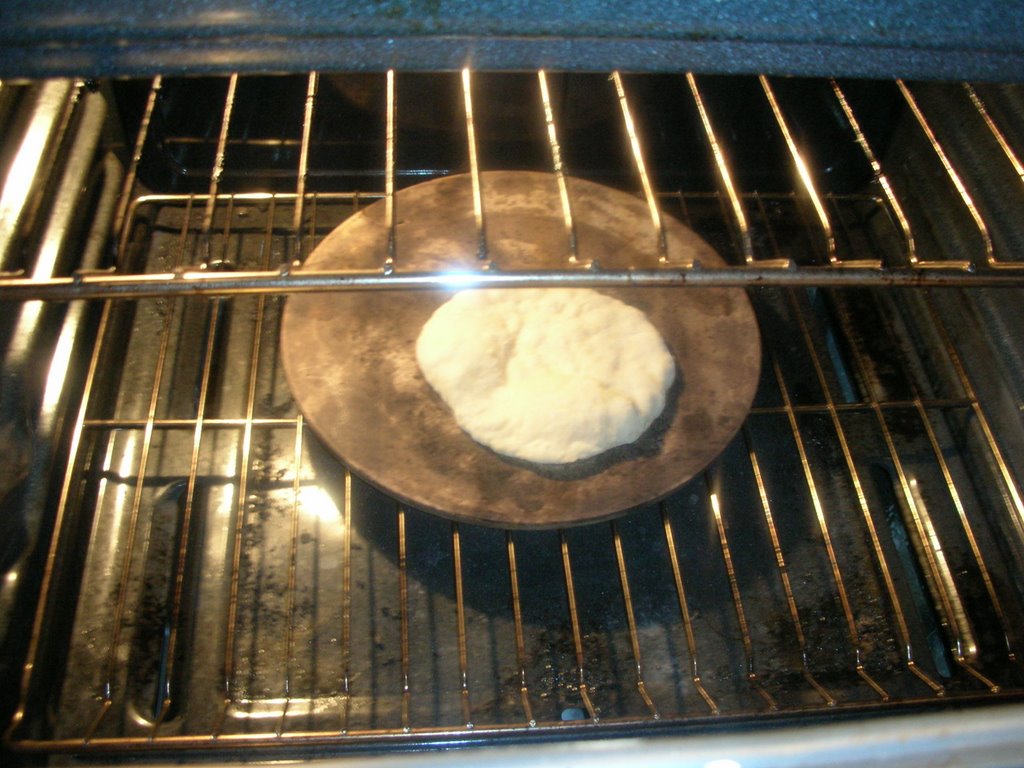
When it came to making naan, there were going to be at least two tricks was going to be not having a tandoor, a clay oven in which food is cooked over a charcoal fire. While I don't have a tandoor I do have a pizza stone and the recipe in 1,000 Indian Recipes indicated that that could work. The second trick would be the timing of cooking the bread.
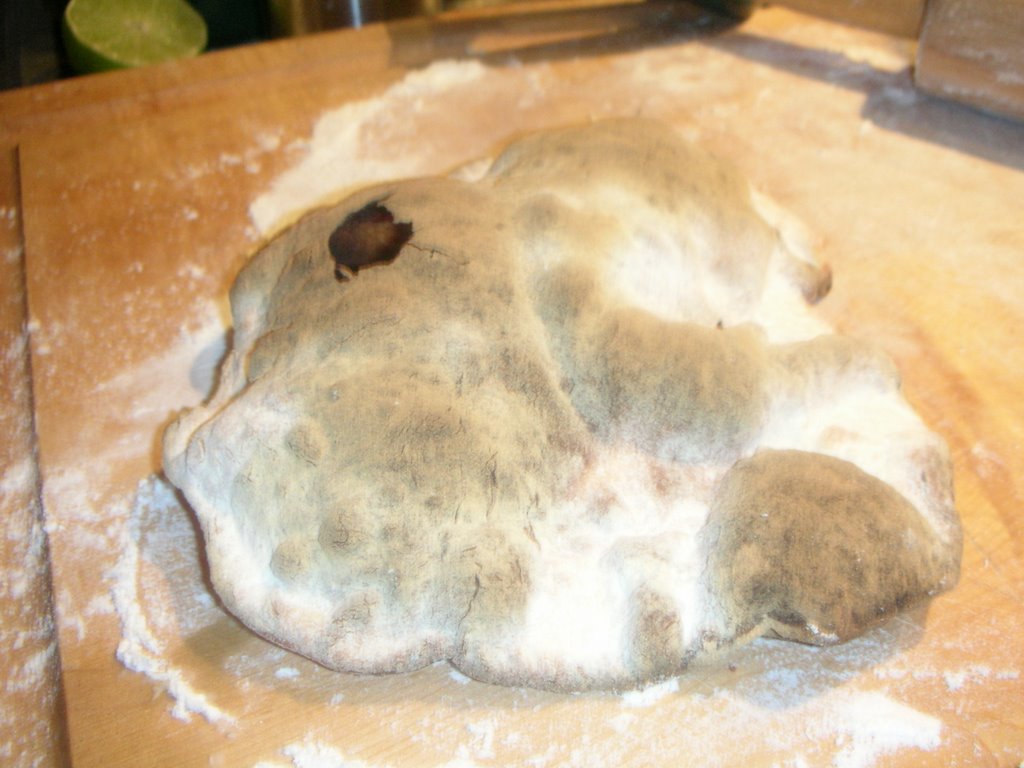 As you can see, at left, finding the right balance can be difficult (see my trial and error below). This isn't something you can leave unattended-- the bread must be watched, constantly! I came across some more advice where else but online. Taunton's Fine Cooking has a recipe for Homestyle Indian Naan with pictures which I didn't use for the recipe as much as for the timing and temperature it advised.
Oven-Grilled Naan and Other Breads (1,000 Indian Recipes, pps. 594-595)
 Naan breads are the crispy triangular breads so popular in Indian restaurants. Traditionallly, they are made with all-purpose flour and are grilled by slapping them against the walls of a super-hot tandoor. Once inside the tandoor, they absorb some of the intocicating smoky aroma from the burning coals, cook quickly and simultaneously from the back to the front, and, because they cook so fast, moisture gets locked inside. All this results in extraordinarily moist and flavorful breads that are as good as they sound-crispy on the outside and moist inside, and almost impossible to reproduce without a tandoor.
 However, making similar breads under the broiler of a conventional oven is the next best thing. For this you can use a baking or broiling tray, or a pizza stone. The stone, of course, ist he better alternative, because once heated, it retains its heat and the breads can cook simultaneously from the top and bottom.
Basic Oven-Grilled Leavened Breads
Tandoori Naan
Makes 10 to 12 breads
This basic recipe is made with refined all-purpose flour and is cooked under the broiler. These naans have yogurt in the dough, for a vegan alternative, use water in its place.
2 Teaspoons Active Dry Yeast
1 Teaspoon Sugar
¼ Cup Warm Water (about 110°F)
½ Cup Nonfat Plain Yogurt, Whisked Until Smooth 2 Tablespoons Vegetable Oil 2 Cups All-Purpose Flour, or Bread Flour ¼ Teaspoon Salt, or To Taste
1 Cup All-Purpose Flour in a Medium-Bowl or a Pie Dish, for Coating and Dusting
¼ Cup Melted Butter or Ghee, for Basting (optional)
1. For the dough, dissolve the yeast and sugar in warm water and set aside until frothy, about 5 minutes. Mix in the yogurt and oil.
2. Place the flour and salt in the food processor and process until mixed. With the motor running, pour the yeast mixture into the work bowl in a thin stream and process until the flour gathers into a ball and the sides of the processor are clean. (If the dough seems too sticky, add some more flour through the feeder tube, or add some more yogurt if the dough is dry and hard.) Transfer to a large bowl, cover with plastic wrap or the lid of the bowl, and place ina warm draft-free spot until it doubles in volume, 3 to 4 hours. (This allows the yeast to ferment and multiply, causing the dough to rise.) If keeping for a longer period, refrigerate the dough.
3. To roll and grill the naan breads, with clean, lightly oiled hands, divide the ough equally into 10-12 balls and cover with foil to prevent drying. Working with each ball of dough separately, place in the bowl with the dry flour, flatten it with your fingertips and coat well with the dry flour. Then transfer to a cutting board or any other clean flat surface and, with a folling pin, roll into a 7- to 8-inch triangle. (If the dough sticks to the rolling surface, dust with more flour.)
4. Place on large baking trays or, if you have a separate broiler, place on the broiler trays--3 to 4 per tray. With a basting brush or your fingers, lightly baste the top of each naan with water. (This prevents them from drying out.)
5. Preheat the oven to broil or preheat the broiler and place the trays, one at a time, 4 to 5 inches below the heating element and broil until small brown spots appear on the top surface, about 1 minute. With a spatula, carefully, turn each naan over and cook until the other side is golden, about 30 seconds. Trasnfer the naan bread to a platter, baste lightly with butter, if you wish, and serve hot.
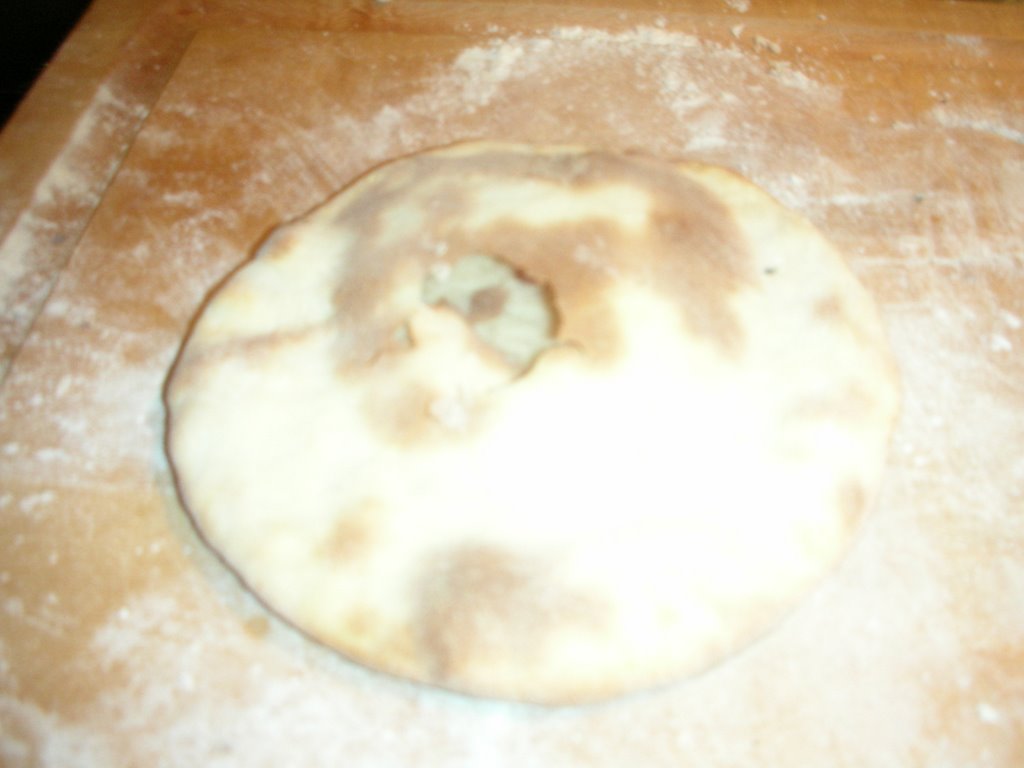 I tried the whole 30 seconds, then flip the bread thing but it made the bread flat and hard on both sides, more like pita bread, unacceptable. I didn't have the oven on the broiler setting which may have had something to do with it but instead at 400°F. In the end I followed the advice I found at Taunton's Fine Cooking. Their recipe for Homestyle Indian Naan says to heat the oven to 500°F and to cook the bread for 5 to 6 minutes.
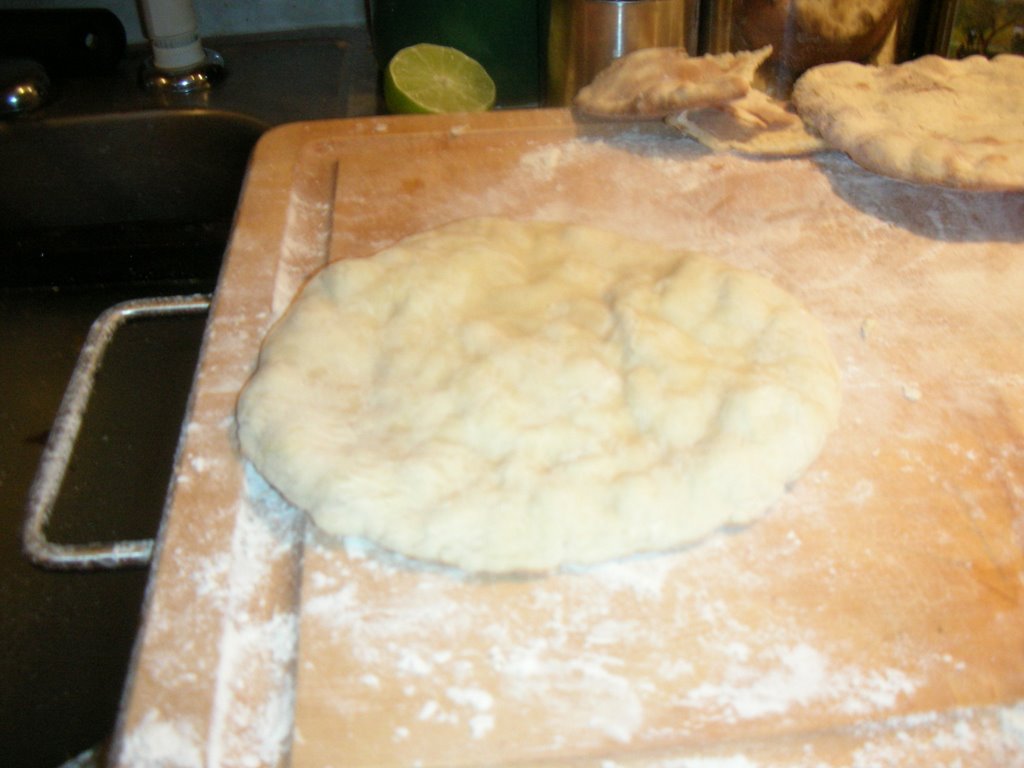 I jacked the oven up to 500°F and tried cooking the bread for 5 minutes but the result, immediately above at left was two crisp on the top. I tried 2 to 3 minutes and this time came away with something that I thought pretty much hit the mark. Naan, fresh in my home.
Well it's all cooked and that's all well and good but there's another part to each dish in the final project, food costing. That and how the pictures get taken are some behind the scenes posts that are going to have to wait for another day!
posted by Turo at 1:37 PM
![]()
![]()


0 Comments:
Post a Comment
<< Home