FORAGING FRIDAY: THE CHEESE STANDS ALONE
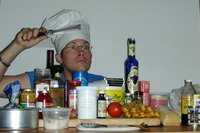 Foraging Friday documents Kitchen Toro's' exploration of New York's diverse restaurants, neighborhoods, stores and their ingredients and flavors.
I admit it, I love toys. While I probably shouldn't be getting any more toys for myself until I can afford them, I went ahead and bought a cheese-making kit.
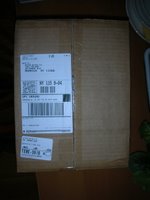 It recently arrived and now I'm integrating it into my final project. I have decided to make a goat's milk ricotta perogi and an ammended version of "Chilled Caprese," my dish of about a month ago at the Entremetier Station.
After searching around on the internet I decided on a kit from a home-kit site called Leener's. I decided "Deluxe Cheese Kit With Press." It cost $79.95 but after shipping the total was $89.07.
 Why did decide on this kit? It seemed to offer more recipes than other kits I was looking at and overall it seemed to have things together. I also kind of fell for the whole "Voted Best By The Wall Street Journal," thing, because you know, The Wall Street Journal knows cheese, or something.
Anyway, Leener's described the Deluxe kit as follows:
With this kit you can make over thirty different types of cheese including the One Hour Mozzarella recipe. Each recipe is formulated to be easily made in any kitchen without investing in expensive equipment. Includes our detailed recipe book which explains the basics of home cheese making. You also get our Squeeze Whey Cheese Press, extra cheese wax and brush for making hard cheeses and the book Home Cheese Making by Riki Carol.
RECIPES INCLUDE: Cream Cheese, Feta, Mozzarella, Cottage, Cheddar, Jack, Goda and more.
1 oz. Rennet 1 oz. Calcium Chloride 2 yd. Fine Cheese Cloth
8 pk. Mesophilic A 2 oz. Citric Acid 1/2 lb. Cheese Wax & Brush
8 pk. Mesophilic M 2 oz. Tartaric Acid 1 ea. Dial Thermometer
8 pk. Thermophilic 3 oz. Flaked Salt 1 ea. Recipes & Instructions
1 oz. Mild Lipase 1 ea. Cheese Press 1 ea. Home Cheese Making
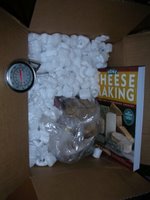
 The kit arrived foam peanuts and all, including a brown paper bag inside which was the lipase and rennet (these required immediate storage in the fridge).
As of so far, I've tried the mozzarella. It worked very well though I think I squeezed too much of the moisture out on the first attempt.
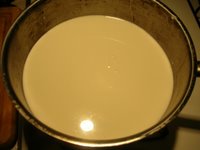
I'm going to use my first mozzarella as part of the mozzarella-marscapone ice cream that will be one of the three savory ice cream flavors featured in my reimagined Mozzarella Caprese, an appetizer I have planned for my final project menu (below my pictures accompany the recipe from "Home Cheese Making" by Ricki Carroll.
 30-minute Mozzarella
Mozzarella was first made by the monks of San Lorenzo di Capua, Italy from sheep's milk. In the 16th centure, when water buffalo were introduced to Naples, the rich milk of those animals started to be used. The following recipe is a quick and easy way to make fresh mozzarella at home in less than 30 minutes! (Make sure the milk you use for this cheese is NOT "ULTRA"-pasteurized. The protein is denatured in the process and will leave you with ricotta rather than mozzarella.)
 For a party treat, slice the mozzarella and arrange it alternatley with rip tomato slices. Then rizzle with fresh pesto, scatter with sun-dried tomatoes, and top with a smattering of pine nuts. Serve with crusty bread and wine. Heaven!
1½ Level Teaspoons Citric Acid Dissolved in ¼ Cup Cool Water
1 Gallon Pasteurized Whole Milk (see note in step 1)
1/8-¼ Teaspoon Lipase Powder (see note in step 1), dissolved in ¼ cup cool water and allowed to sit for 20 minutes, for a stronger flavor (optional)
¼ Teaspoon Liquid Rennet (or ¼ rennet tablet) diluted in ¼ cup cool, unchlorinated water
1 Teaspoon Cheese Salt (Optional)
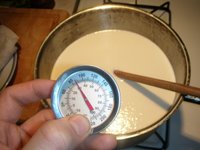 1. While stirring add the citric acid solution to the milk at 55°F and mix thoroughly. (If using lipasse, add it now.)
NOTE: You may use skim milk, but the yield will be lower and the cheese will be drier. If you add lipase to this cheese, you may have to use a bit more rennet, as lipase makes the cheese softer. Try the recipe without it first and experiment later.
2. Heat the milk to 88°F over medium/low heat. (The milk will start to curdle.)
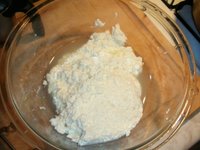 3. Gently stir in the diluted rennet with an up-and-down motion, while heating the milk to between 100-105°F. Turn off the heat. The curds should be pulling away from teh sides of the pot; they are ready to scoop out (approximately 3 to 5 mintues for this).
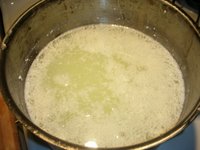 4. The curds will look like thick yogurst and have a bit of shine to them, and the whey will be clear. If the whey is still milky white, wait a few more minutes.
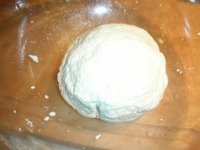 5. Scoop out the curds with a slotted spoon and put into a 2-quart microwavable bowl. Press the curds gently with your hands, pouring off as much whey as possible. Reserve the whey.
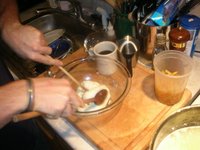 6. Microwave the curds on HIGH for 1 mintues (see box at left(. Drain off all excess why. Gently fold the cheese over and over (as in kneading bread) with your hand or a spoon. This distributes the heat evenly throughout the cheese, which will not stretch until it is too hot to touch (145°F inside the curd).
 7. Microwave two more times for 35 seconds each; add salt to taste after the second time (optional). After each heating, knead again to distribute the heat.
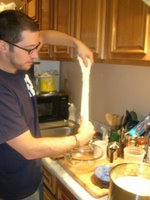 8. Knead quickly until it is smooth and elastic. When the cheese stretches like taffy, it is done. If the curds break instead of stretch, they are too cool and need to be reheated.
 9. When the cheese is smooth and shiny, roll it into small balls and eat while warm. Or place them in a bowl of ice water for ½ hour to bring the inside temperature down rapidly; this will produce a consistent smooth tecture throughout the cheese. Although best eaten fresh, if you must wait, cover and store in the refrigerator.
YIELD: ¾-1 pound
TROUBLESHOOTING: If the curds turn into the consistency of ricotta cheese and will not come together, change the brand of milk; it may have been heat-treated at the factory to too high a temperature.
Fair warning: this isn't the last you'll hear of me using a kit to make something from scratch. While I may be able to resist ordering the sake, cordial and mead kits until I have a paycheck stay tuned for next Friday's home kit foraging installment.


0 Comments:
Post a Comment
<< Home